This is a series of blog posts where I write about my experiences making other bloggers/instagramers recipes. I hope you enjoy it and if you have a blogger you want me to check out – let me know in the comments.
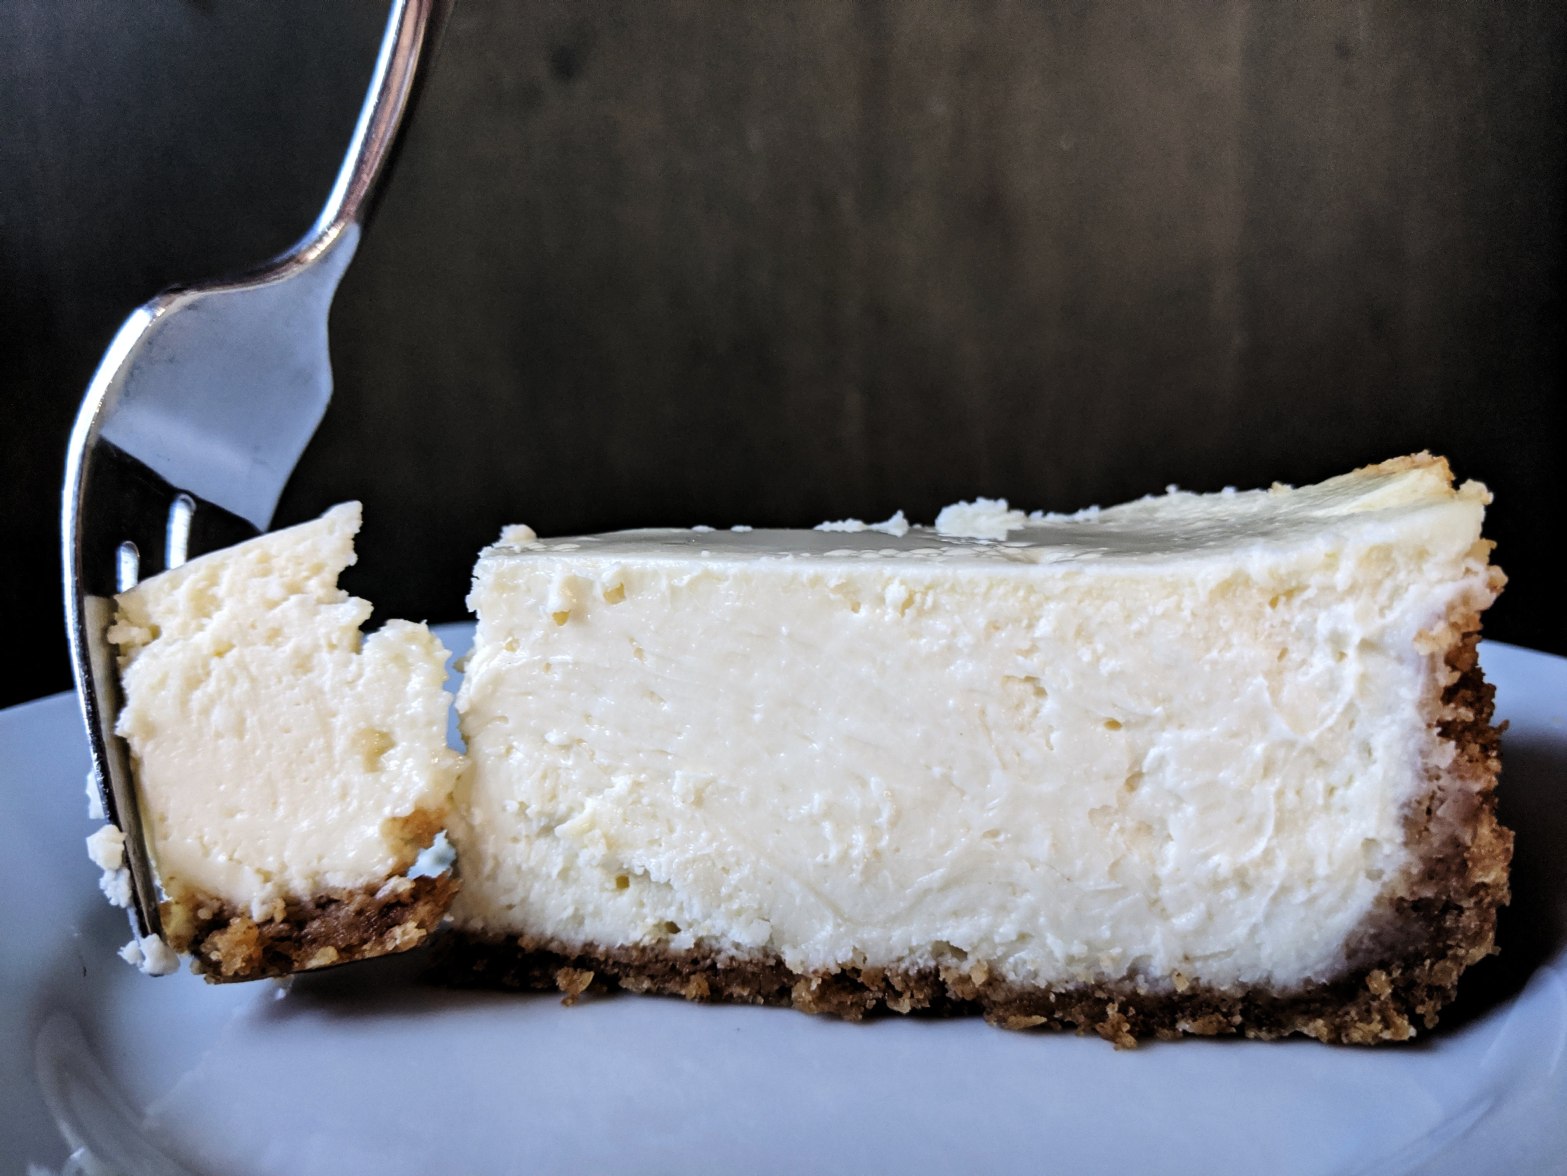
I made this cheesecake for New Year’s Eve last month and it was a HIT!!!! I’m not kidding when I say it was beyond delicious, one friend even said it was the best cheesecake he’s ever had. It comes from the cookies and cups blog (you might remember one of my first blog posts was her praline cracker treat that I made for the holiday season last year) and she has great detailed instructions. Follow along with her and give it a shot! You will not be disappointed! https://cookiesandcups.com/perfect-cheesecake/
Tip 1: Make sure to give yourself time to make it – the day before would be perfect! It takes time to let the cream cheese come to room temperature – which is necessary – and it also takes a while to cool in the fridge.
Tip 2: Make sure to follow her instructions – no shortcuts or substitutions.
Tip 3: I have read in multiple places that cheesecake freezes really well. So, if you want to make this but don’t want a whole cheesecake laying around, slice up half of it and freeze in a gallon size freezer bag.
Happy baking!!! – Jenny
For more tips and tricks follow me on Instagram at sugar.and.stice
This is going to be the start of a series of blog posts where I tell you new recipes from bakers that I have been trying out. I hope it will be a fun way to share what I’ve been up to in the kitchen and give you more recipes to try yourself!If you have a favorite baker you want me to try out let me know in the comments!
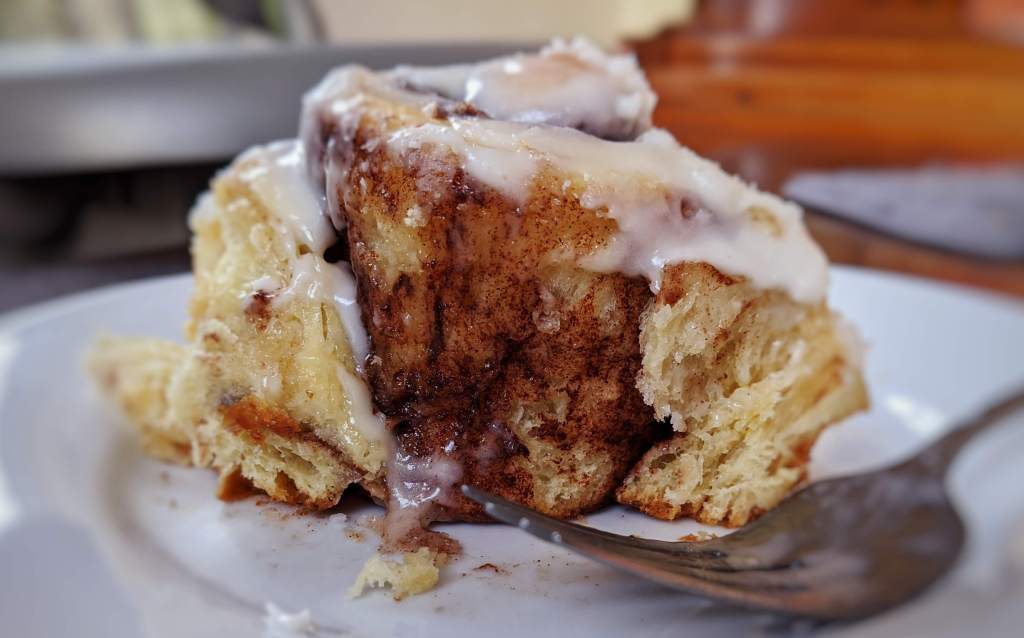
Recently I found a baker on Instagram that had a lot of great reviews on her cinnamon roll recipe. In fact, she had been featured on a couple other blogs as the winner of their cinnamon roll bake-offs. This was too great a temptation and I knew I had to give the recipe a go and man oh man it did not disappoint! The cinnamon roll turned out tall, light, and fluffy with great cinnamon taste.
The blog is called The Vanilla Bean Blog and her name is Sarah Kieffer. Here is a link directly to her cinnamon roll recipe http://www.thevanillabeanblog.com/2019/12/cinnamon-rolls.html The dough itself is actually very easy to put together. It takes some time and attention but is so worth it. Also, making sure to put it in the fridge to rest is CRITICAL so know that this recipe is one you’ll want to make the night before or start early in the morning for rolls that night.
Here are some of my tips for this recipe:
1) It takes an hour or two for the dough to warm back up to temperature after being in the fridge to rest. So be sure to account for that in your timing.
2) I like more butter in my filling so I actually use 1/3 cup of super soft butter.
3) Feel free to use any kind of frosting or icing that you like on these. I used a simple buttercream frosting that I had leftover from another recipe and it was delicious!
That is all the tips I have for you on this recipe – which tells you how FANTASTIC it is! So go over to her blog and check it out for yourself!
Happy Friday -Jenny
For more tips and tricks follow me on Instagram at sugar.and.stice
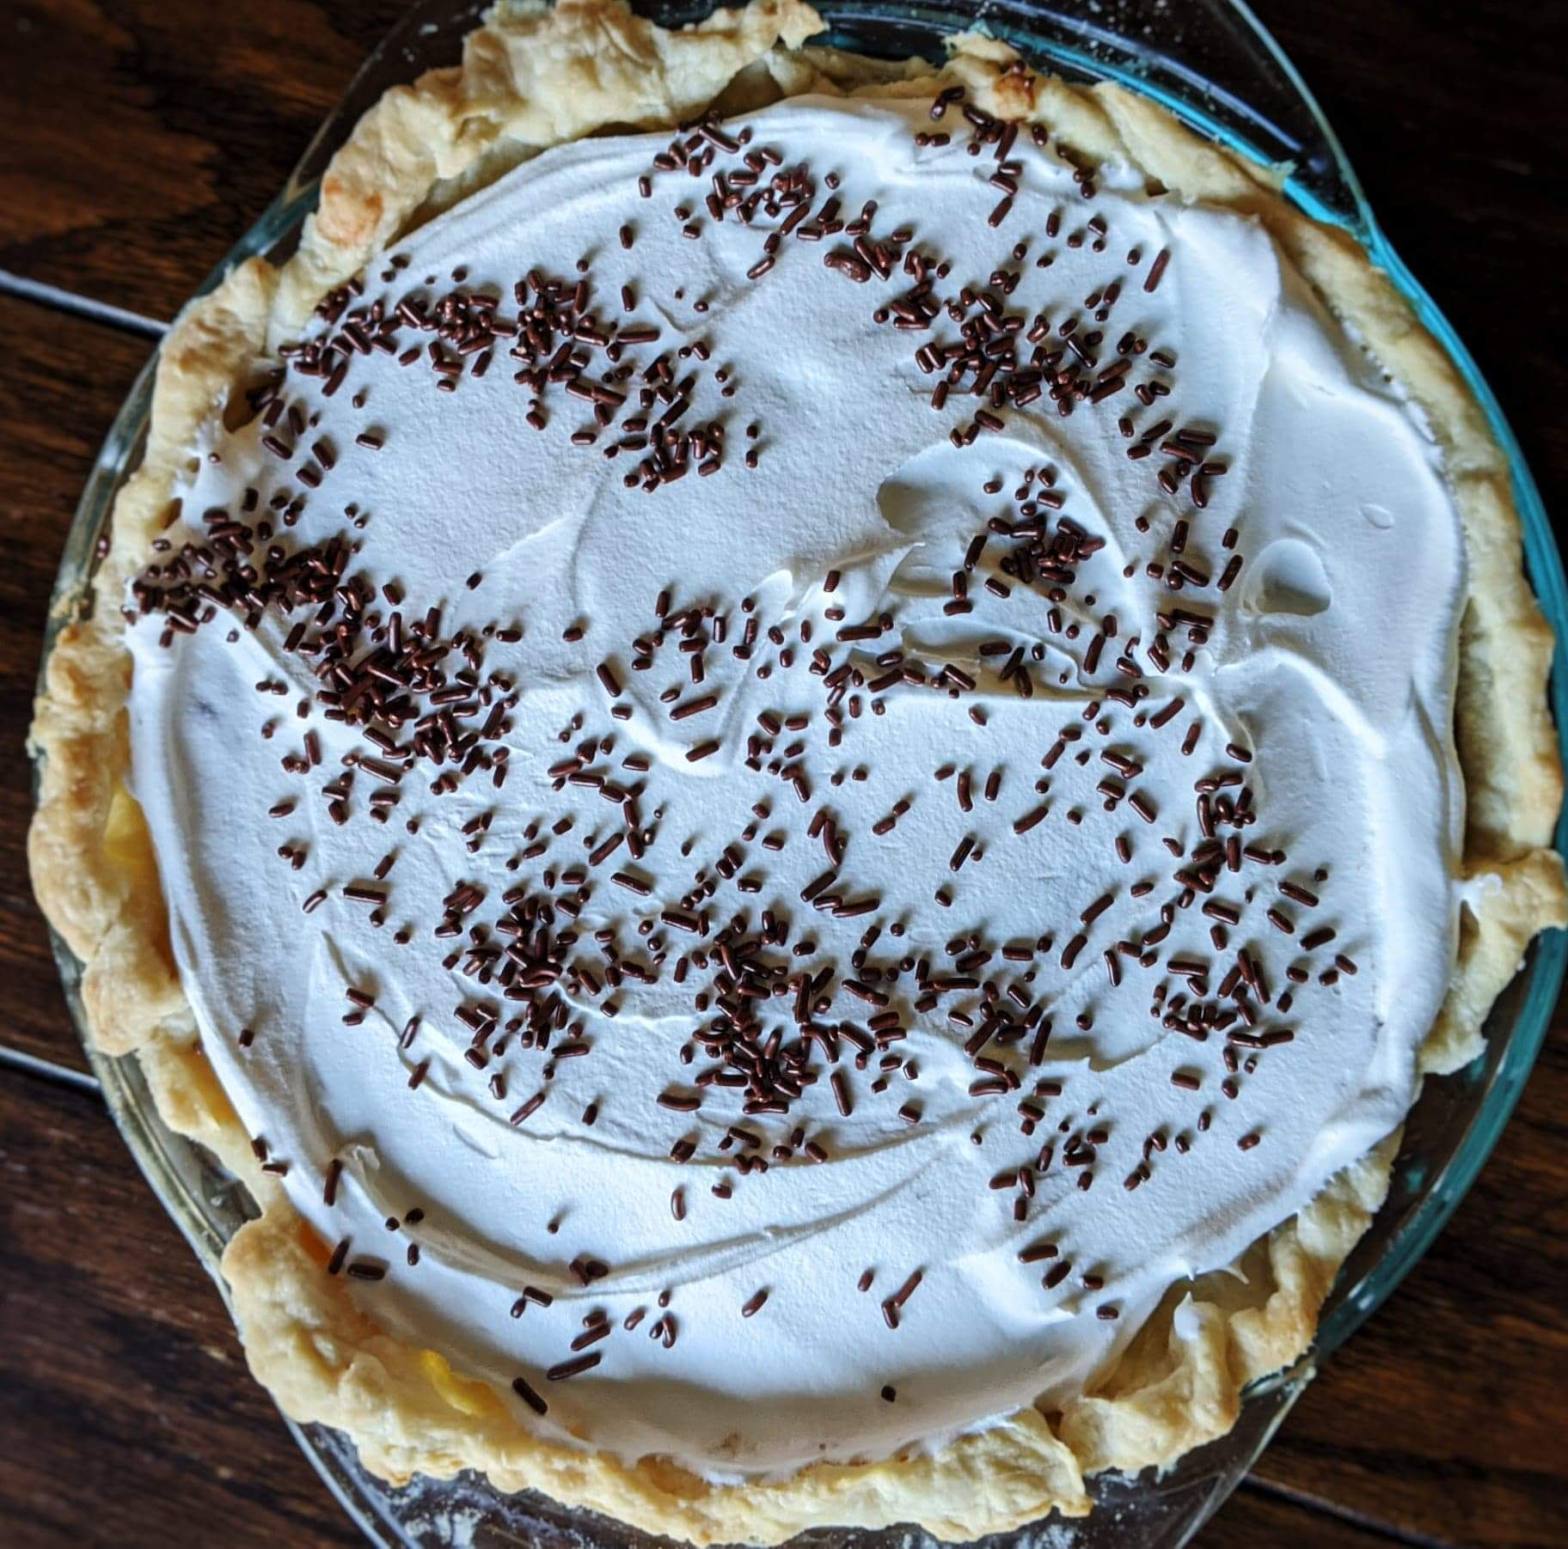
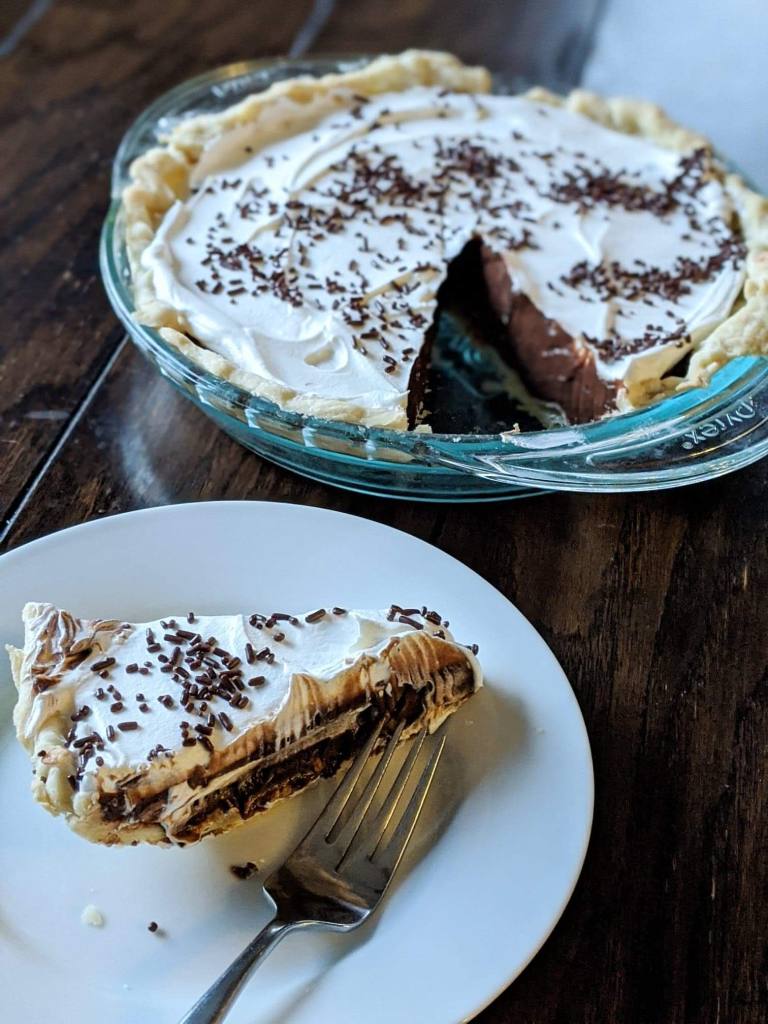
Here is a deliciously easy pie that can be whipped up in no time! This is a guaranteed kid favorite. In fact, it is so easy that your kids could help you make it! So have them join you in the kitchen for some family bonding and treat time!
One 5.9 ounce box of instant chocolate pudding mix
2.5 cups of cold milk
One small tub of cool whip
Directions:
In a big bowl pour 2.5 cups of cold milk
Whisk in, slowly, all of the instant chocolate pudding mix until incorporated
Pour the pudding mixture into the cooled pie crust shell
Put in the refrigerator for at least 10 mins
Before serving add a layer of cool whip on top of the chocolate pudding
Yes, I know the pudding box says to use 3 cups of milk but we want our pudding to be slightly thicker than normal so it will hold up when sliced.
You can be creative and do this recipe with many kinds of instant pudding mix!
Also, if you make this for an occasion or holiday, feel free to add sprinkles on top of the cool whip – the kids can DEFINITELY help with that!
Well, there you have it! I hope you give this a shot and get your kids to join you to make memories in the kitchen. If you do end up making it, let me know what you thought in the comments below!
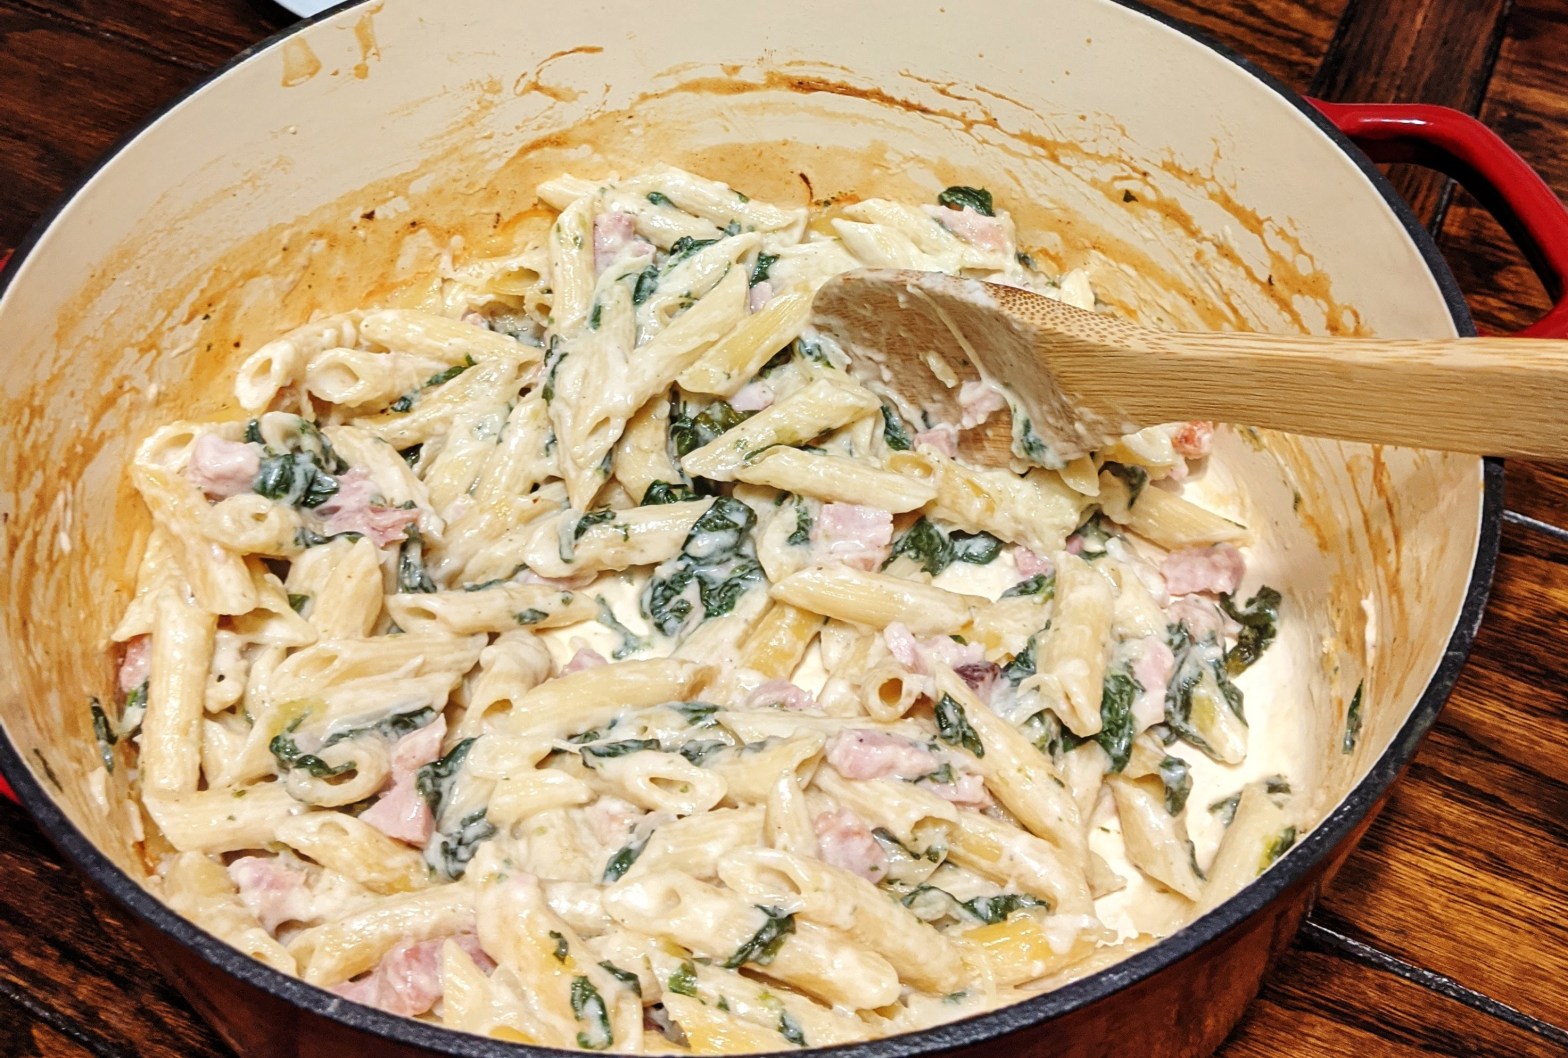
I have been making this dish for years and years. It’s actually the first dinner I made by myself back when I was a teenager for my family and I remember being so nervous. It turned out great though and since then I’ve made it even better. I even got to use my brand new enameled cast iron pot I received for Christmas this year so it was a good day!
Serves 3-4 (this recipe can be doubled easily)
8 ounces penne pasta
5 ounces fresh spinach, washed & roughly chopped
3 tablespoons butter
1/4 cup onion, cut into thin slices
1 clove minced garlic
1/4 cup all-purpose flour
1/4 teaspoon dried thyme, crushed
1/8 teaspoon black pepper
1/2 teaspoon salt
1 1/2 cups half&half or milk (whole or 2%)
1 1/2 cups chicken broth
1 1/2 cups fully cooked ham cut into cubes
1/4 cup fresh Parmesan
Instructions:
Cook pasta according to package directions – during last 2 minutes of boiling add spinach. Drain and set aside.
Preheat oven to 350 degrees.
In large pot melt butter over medium-low heat. Add onions and garlic and cook for 5 minutes. Stir in flour, thyme, pepper, and salt. Cook for 1 minute.
Add half&half (or milk) and chicken broth all at once. Cook and whisk till bubbly then cook for 1 minute more. Stir in pasta, spinach and ham.
Pour into a casserole dish (or if you have a pot like mine you can put it directly into the oven) and cook uncovered for 30-35 minutes.
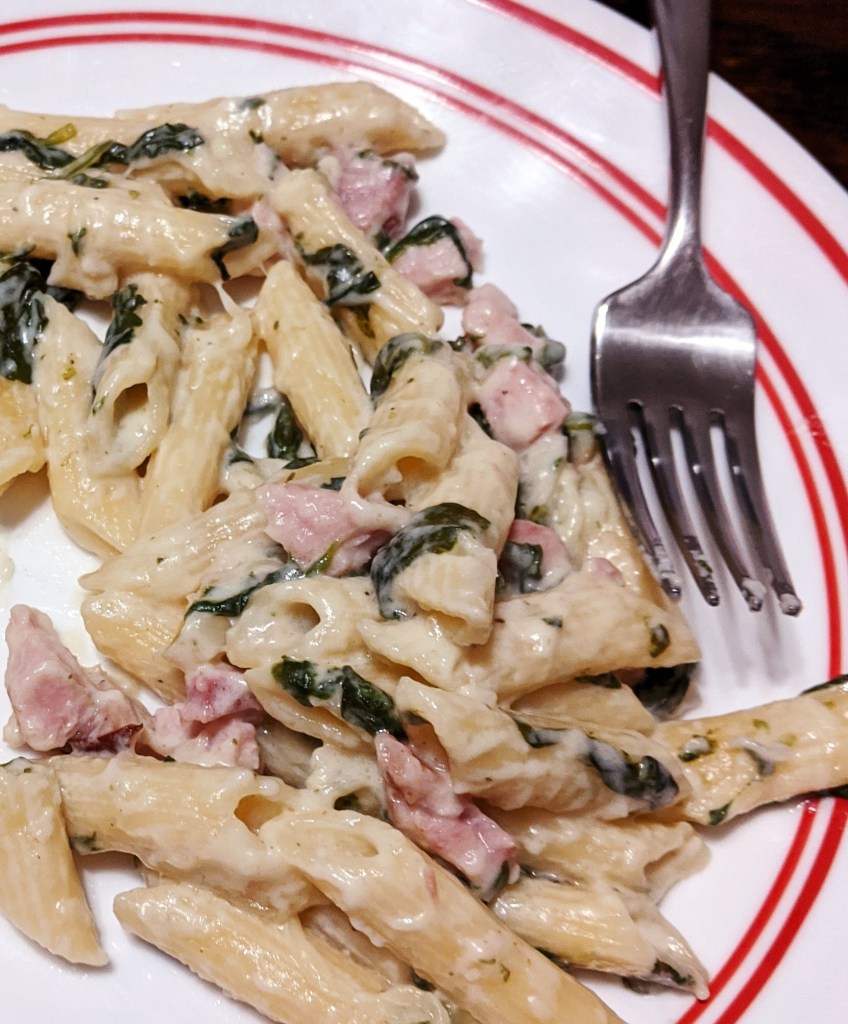
After taking out of the oven, top with fresh parmesan and give a quick stir before serving.
This dish is simple yet so creamy and flavorful. The whole family ate it with multiple servings and we didn’t have any leftovers. I will be doubling this the next time I make it!
As always, if you end up making this dish let me know in the comments – Jen
For more tips and tricks follow me on Instagram at sugar.and.stice
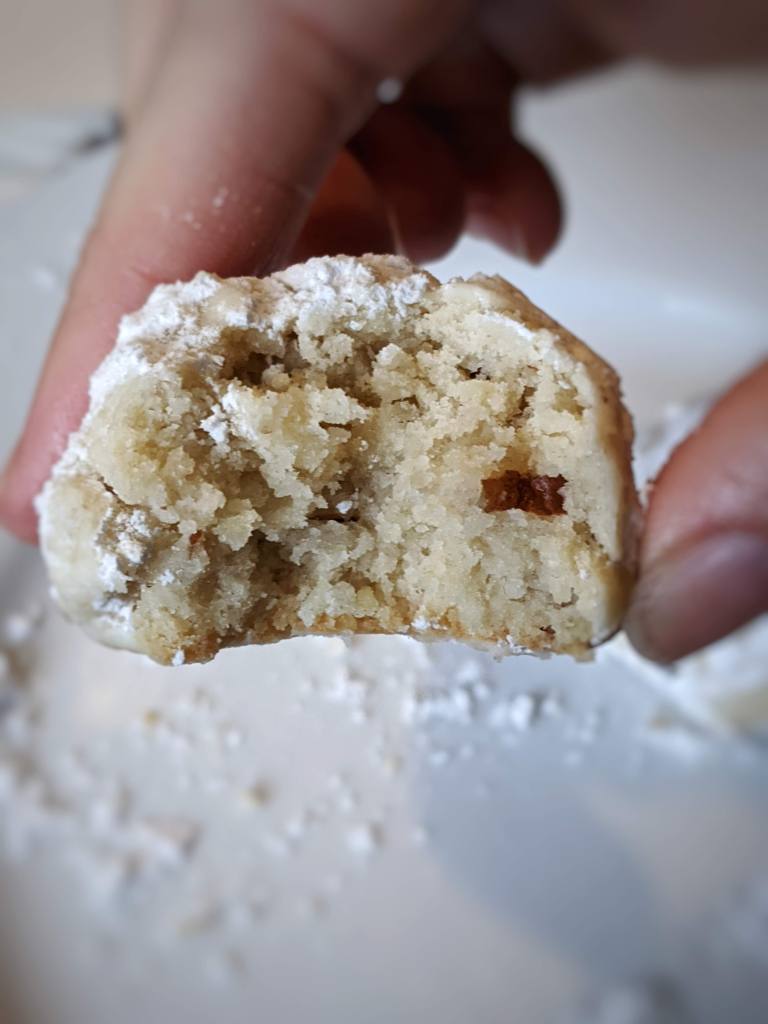
These cookies go by many names but seeing how I only eat them around the holidays, snowball seems most appropriate. I love this recipe that has been in our family for years. It is soft and delicate and so so good! This recipe is simple to put together with only 6 ingredients and one bowl. So whip these up this holiday season with the help of the kids and enjoy!
Makes 2 dozen
1 cup butter softened slightly
1/3 cup granulated sugar
2.5 teaspoons water
1 teaspoons vanilla
2 cups all-purpose flour
3/4 cup chopped pecans
Cream butter and sugar together then add water and vanilla; mix well. Mix in the flour and nuts; chill in fridge for 1 hour.
Shape into balls, about 1.5 or 2 tablespoon size, and bake on an ungreased (or on parchment paper lined) cookie sheet at 325 degrees for 20 mins. Remove from pan and cool slightly. Roll in confectioners’ sugar.
Hope you make them! Jenny
Follow me on Instagram for more tips and tricks at sugar.and.stice
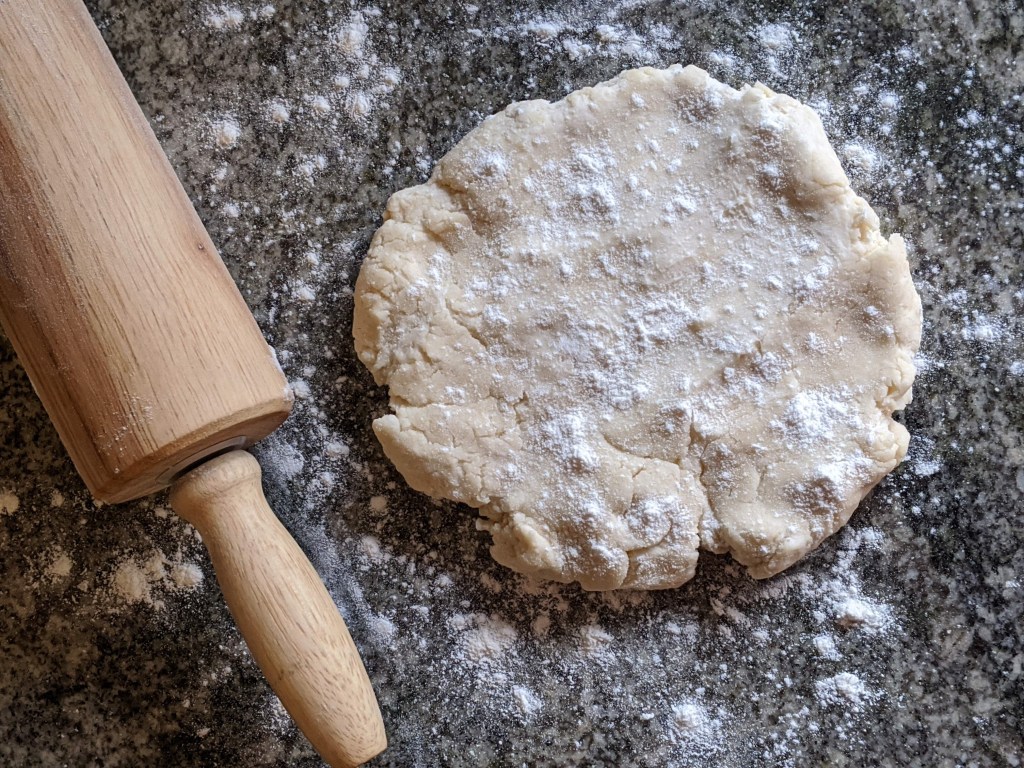
Thanksgiving and Christmas are right around the corner and I want to help you be prepared and make your holidays even brighter! One way you can transform a good pie into a great one is to make your own homemade pie crust. If you have never done it before, don’t fret. It really isn’t that hard! And remember – a bad homemade pie crust is still better than store bought!
I decided a couple of years ago that I wouldn’t use vegetable shortening anymore and have been working on transitioning to all butter. That goes for my cookies, biscuits, pie doughs, etc and honestly it all tastes SO much better!
This recipe makes 2 pie shells:
2 cups all-purpose flour
1 teaspoon of salt
2/3 cups of butter ***THIS IS KEY —-> it needs to be room temperature! Not super cold like most people say – I have found that if you take your butter out 30 mins prior to mixing it up then it makes a flaky pie crust! It should be slightly soft but not so much that it molds to your finger when you push on it.
6-8 tablespoons of ice cold water, as needed
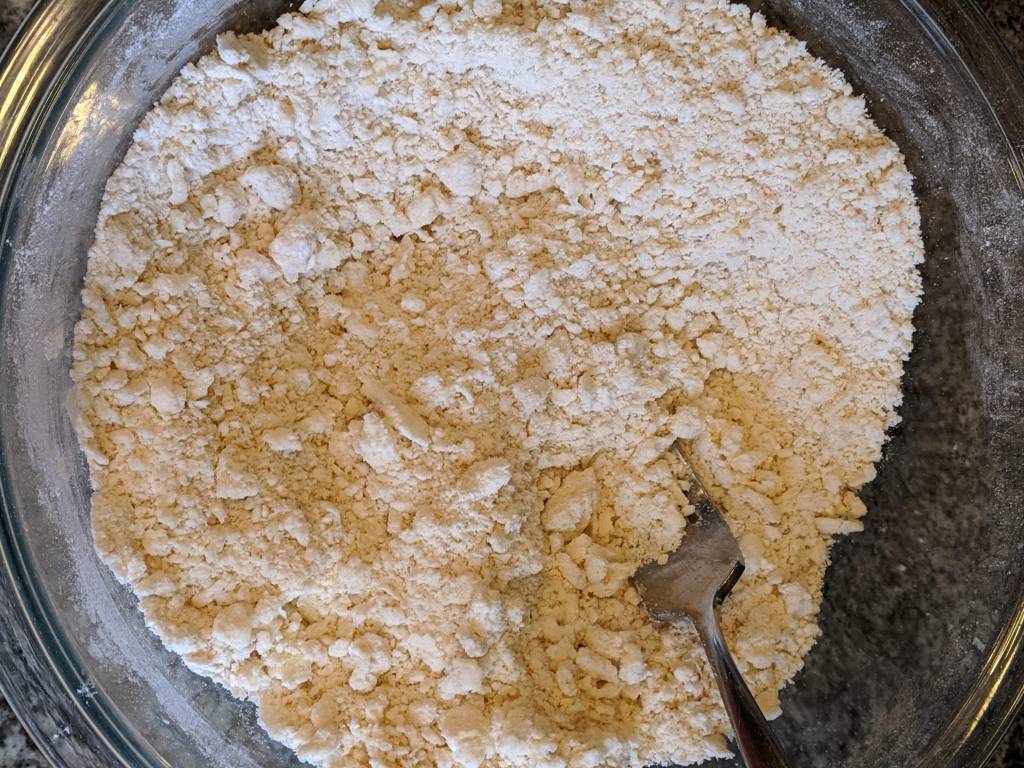
Mix the flour and salt together and then cut in the butter with a pastry cutter until mixed in fairly well, smaller than the size of peas.
If you don’t have a pastry cutter you can use your fingers but wash your hands in cold water first so you don’t melt the butter.
Add the water slowly, mixing it with a fork, until the dough holds together. You might not use all of the water or you might need a touch more. This is the part that takes practice but even if you add too much, it will really be fine 🙂 So once it can be formed into a ball you’ll make 2 evenly portioned balls and press it tightly together. Then press the ball of dough down into a disk shape.
IF YOU WANT AN EXTRA STEP you can wrap each disk in plastic wrap and let it rest in the fridge for 30 mins before moving on OTHERWISE on a lightly floured surface roll the pie dough disk out to about 1/4 in thick. You will need to lightly flour the top of the dough to make sure it doesn’t stick to the rolling pin. Also, after every few rolls you should turn your pie dough 45 degrees to ensure that it isn’t sticking to the counter and to ensure even thickness.
Place the dough into the pie dish and press it around the edges. Then with a fork poke holes all over the pie crust.
If you need a baked pie shell for fresh pies then bake in a 425 degree oven for 15-20 mins until lightly browned. Otherwise use the pie dough as directed by your recipe.
TIP: if you have any extra pie dough that you had to cut off when fitting in the pie pan you can lay it on a baking sheet and sprinkle cinnamon and sugar on it and cook it at 425 degrees for a few minutes until its lightly browned and puffed.
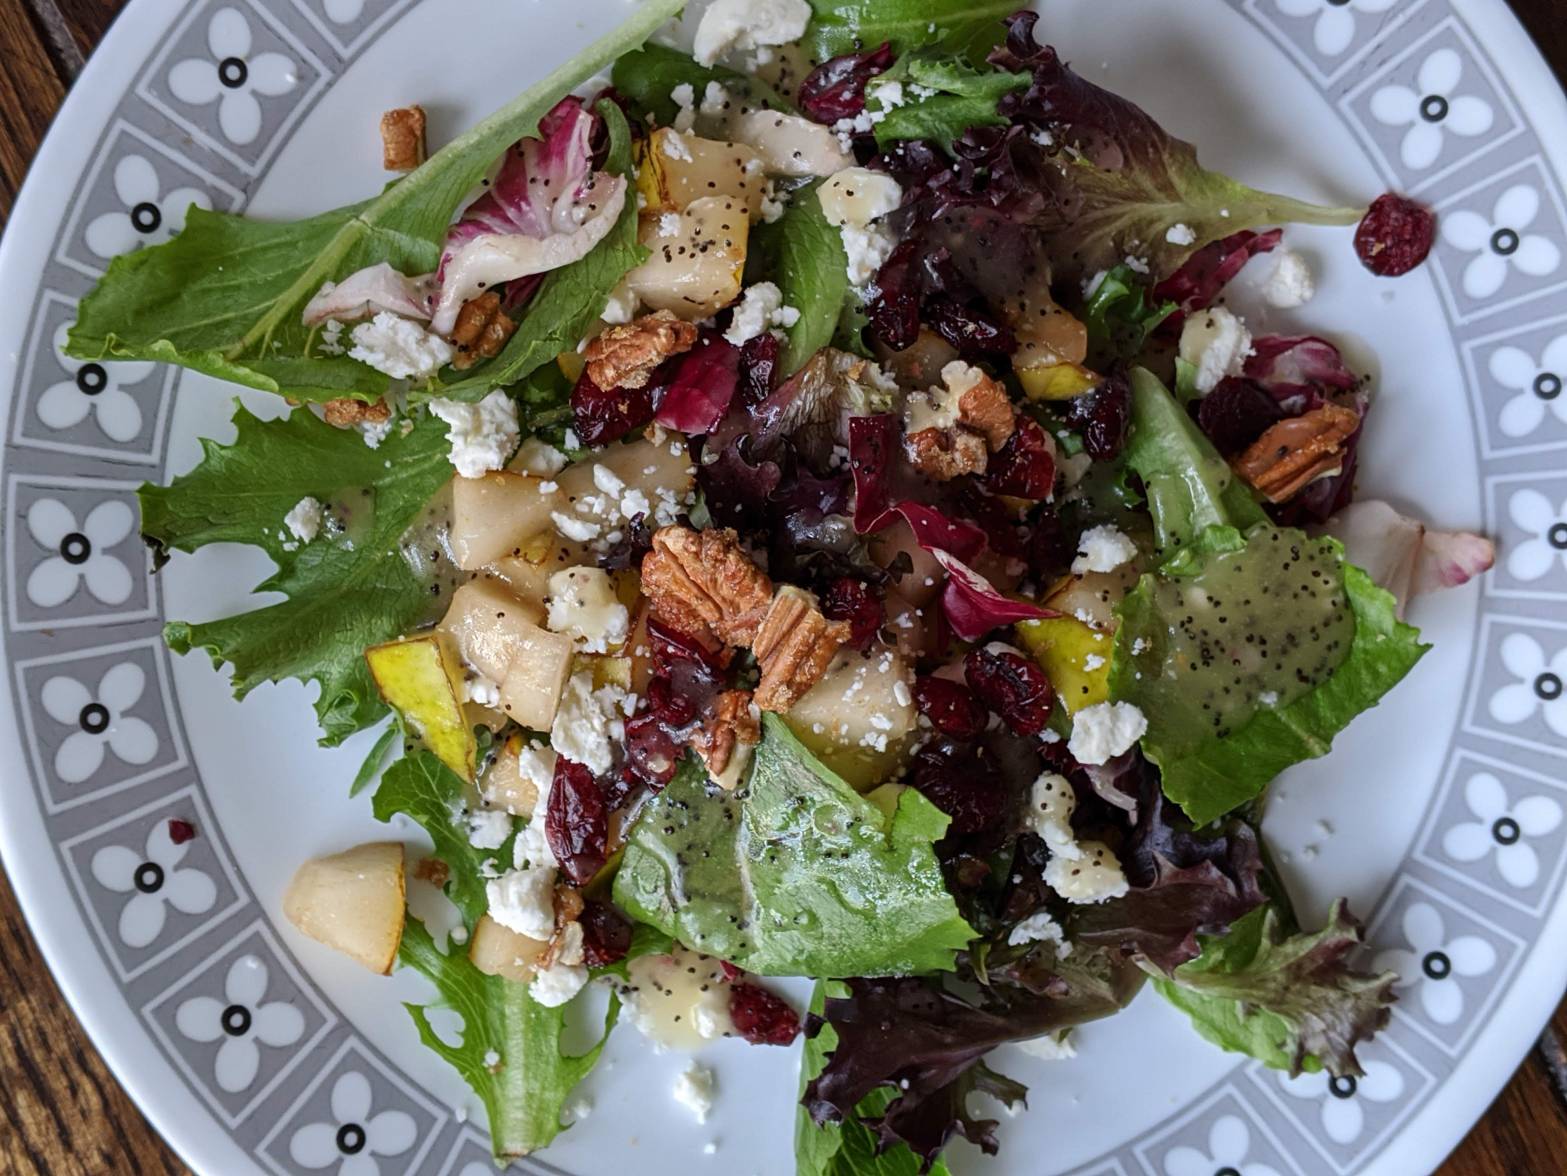
I had this salad for the first time at a church function and instantly loved it! It is a great mixture of textures and tastes. It would be a beautiful and delicious side dish to any dinner or party you are having. This serves 8-10 people as a side.
If you’re making this for a smaller group, 1/3 or 1/4 the salad dressing recipe. Make the salad dressing first – at least 4 hours ahead of time.
1/4 cup chopped red onion
1 tsp Dijon mustard
1/3 cup vinegar
1.5 Tablespoons poppy seeds
1/3 cup granulated sugar
1/2 teaspoon salt
1 cup of oil (canola, olive, etc whichever you prefer)
Puree the red onion in a blender and then add all the remaining ingredients (except the poppy seeds) and blend well. Add the poppy seeds and store in the fridge until time to serve.
Caramelize the pecans:
Put 3/4 cup of chopped pecans and 3 Tablespoons of brown sugar in a pan over medium heat. Stir constantly until the brown sugar melts onto the pecans. Remove from pan and store until ready to use.
When ready mix together
14 oz or more of spring mix lettuce (whichever amount you can find at the store)
3 oz feta cheese
1 or 2 chopped pears
1/2 cup craisins
the caramelized pecans
enough salad dressing to lightly coat
It is so yummy and I hope you make it soon! Let me know in the comments if you do! – Jenny
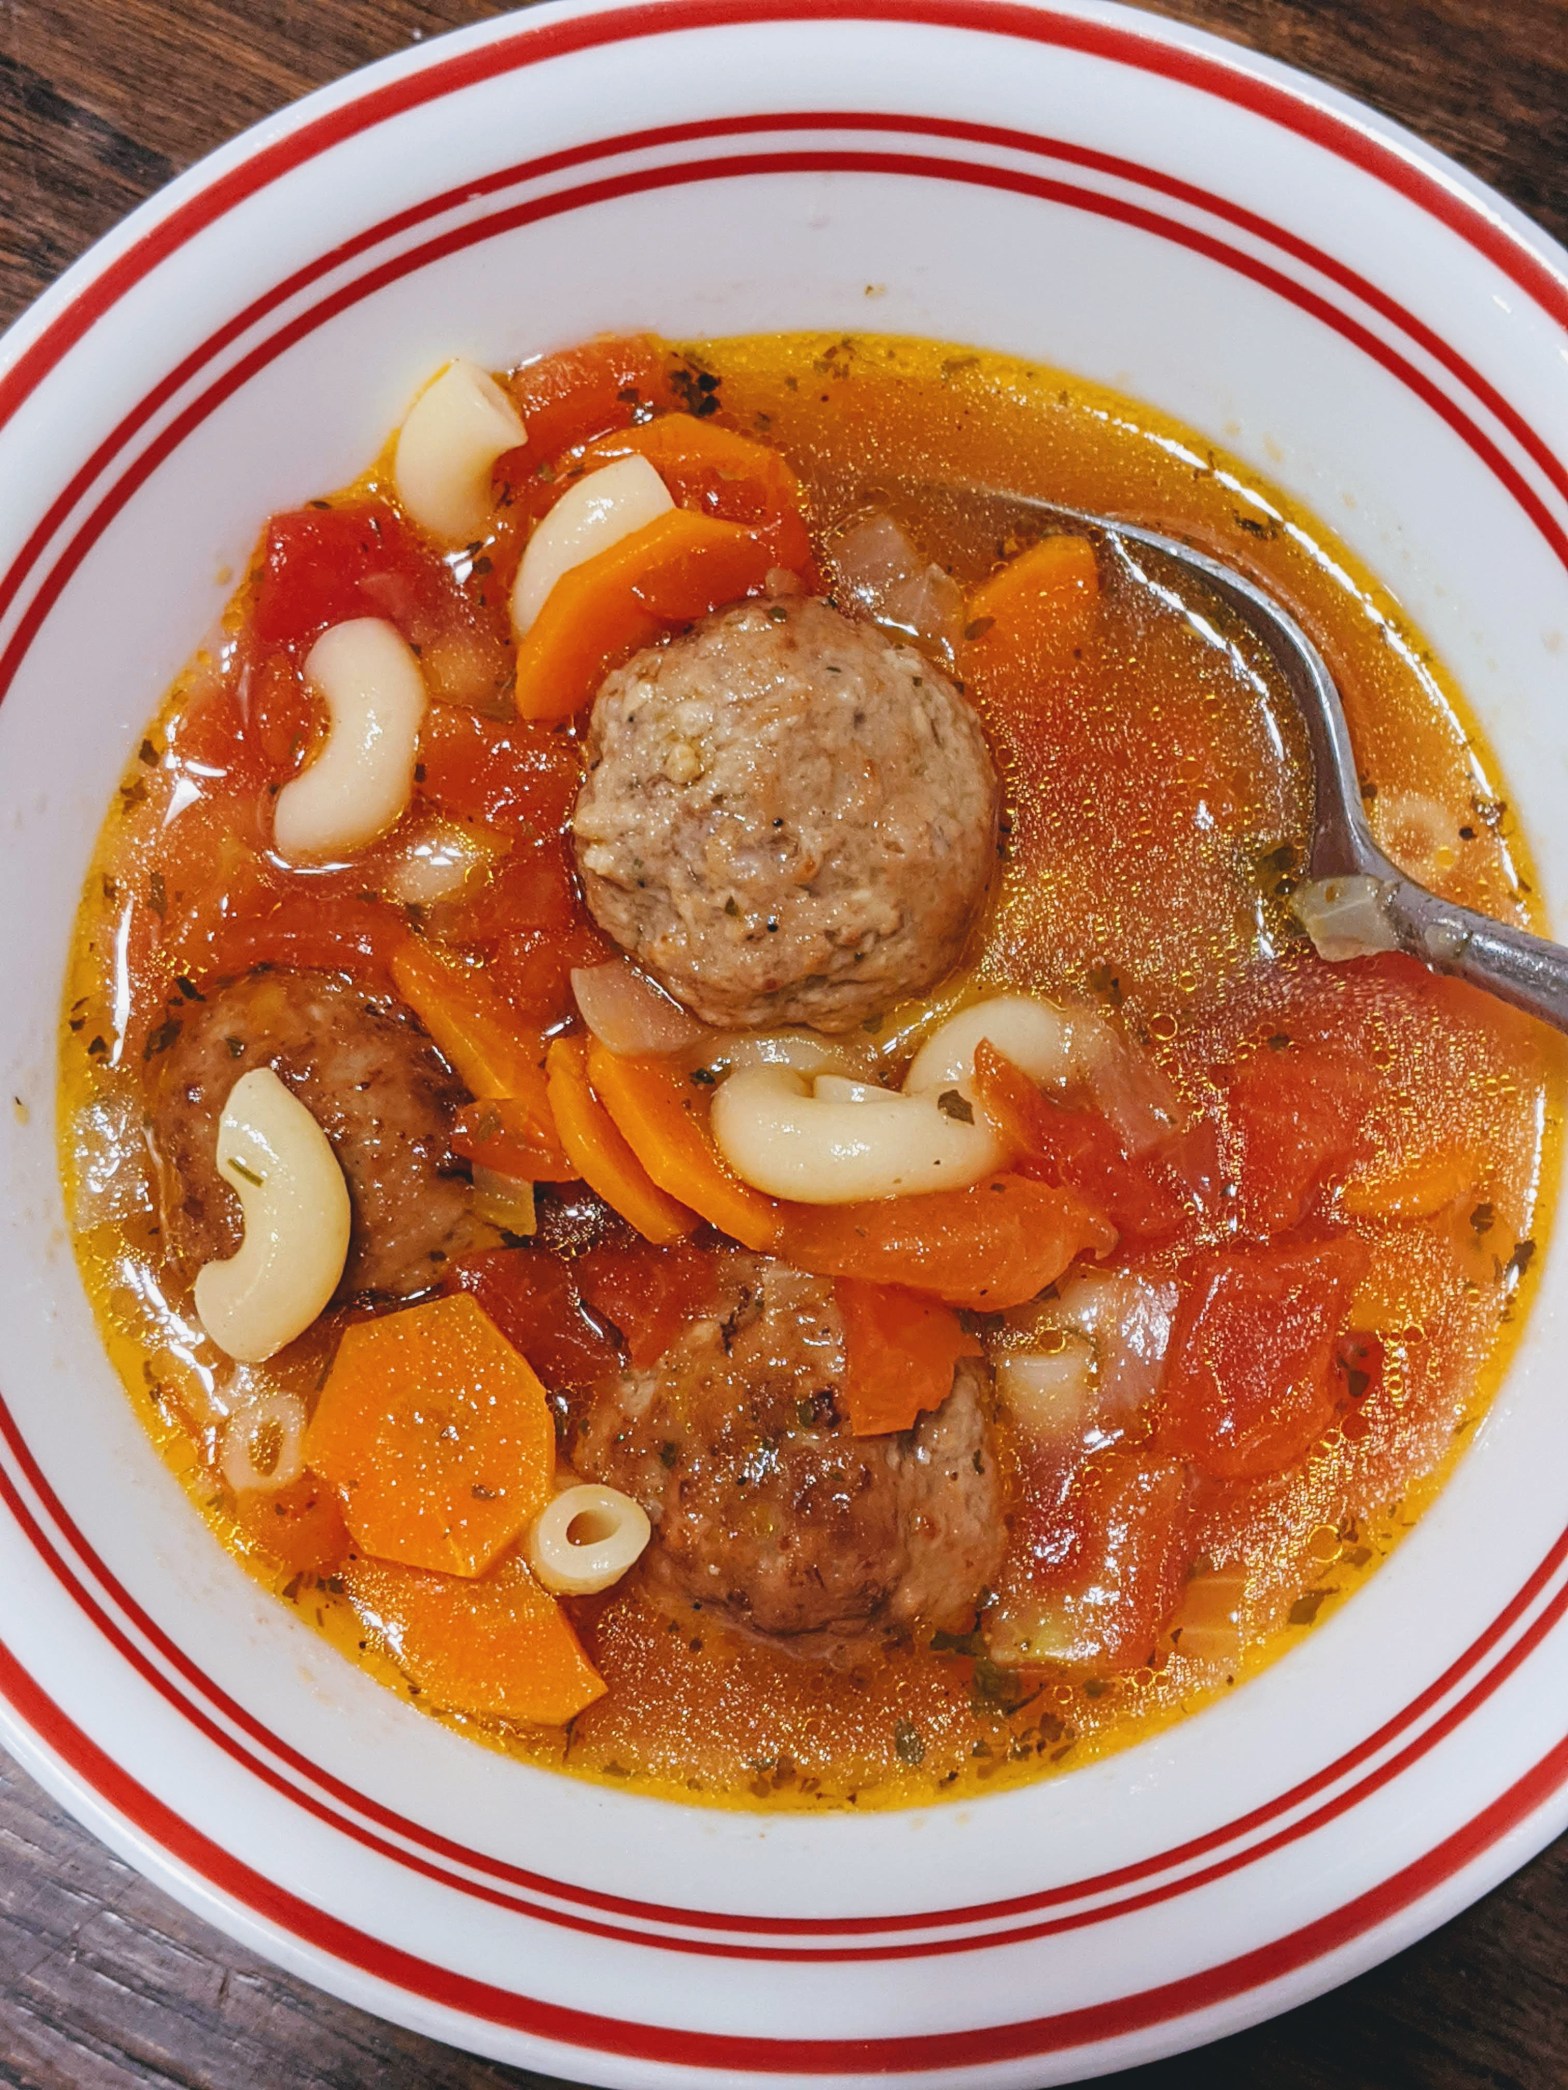
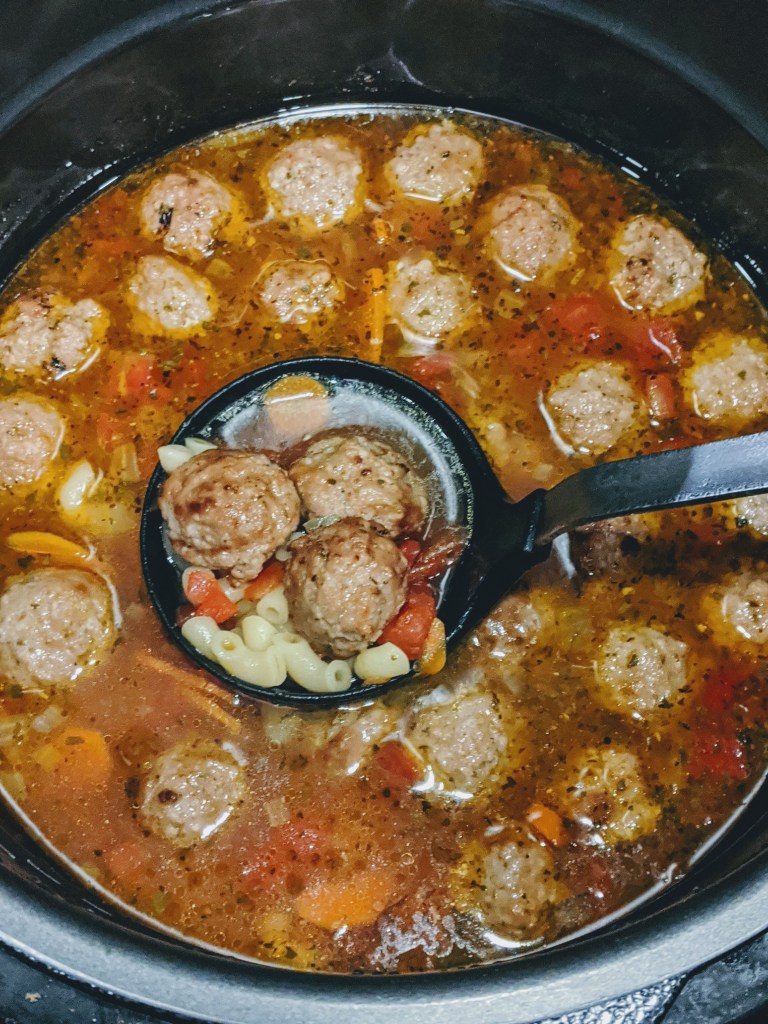
Here is another Sugar & Stice original recipe! Can you tell i’m a fan of broth-y soups? They are so simple to make and carry a ton of flavor. I love getting to sip on the last drips of the broth at the bottom of the bowl.
I love to make this in my pressure cooker but it can be made on the stove as well. Just know if you make it on the stove, you may have to add more chicken broth to make up for liquid lost during evaporation <— which is something that doesn’t happen inside the contained environment of a pressure cooker. Just keep an eye on your soup as your noodles cook to make sure there is enough liquid for them to soak up and still keep your dish a soup.
Serves 4-6
2 Tablespoons of olive oil
1/2 cup chopped onion
2 large carrots sliced or minced
1 teaspoon minced garlic
1 – 14.5 oz can of diced tomatoes
5 cups chicken broth
1/4 teaspoon each of dried basil, dried oregano, and dried parsley
3/4 teaspoon of salt
16 oz of frozen cooked meatballs (I use the homestyle great value meatballs from walmart)
heaping 1/2 cup of elbow macaroni
Step 1: Heat olive oil in pressure cooker (or on a pot on the stove over medium heat) and add onion and carrots. Cook for 5 mins or until the onions look soft. Add garlic and cook for 1 minute.
Step 2: Add the rest of the ingredients and stir
Step 3: Cook for 4 mins in your pressure cooker and let it sit for 10 mins after it beeps. Then manually release any pressure still left. ***If cooking on the stove simmer until the noodles are soft.
And that is it! Really simple and quick to put together. We absolutely love this soup! I hope you will give it a try – Jenny
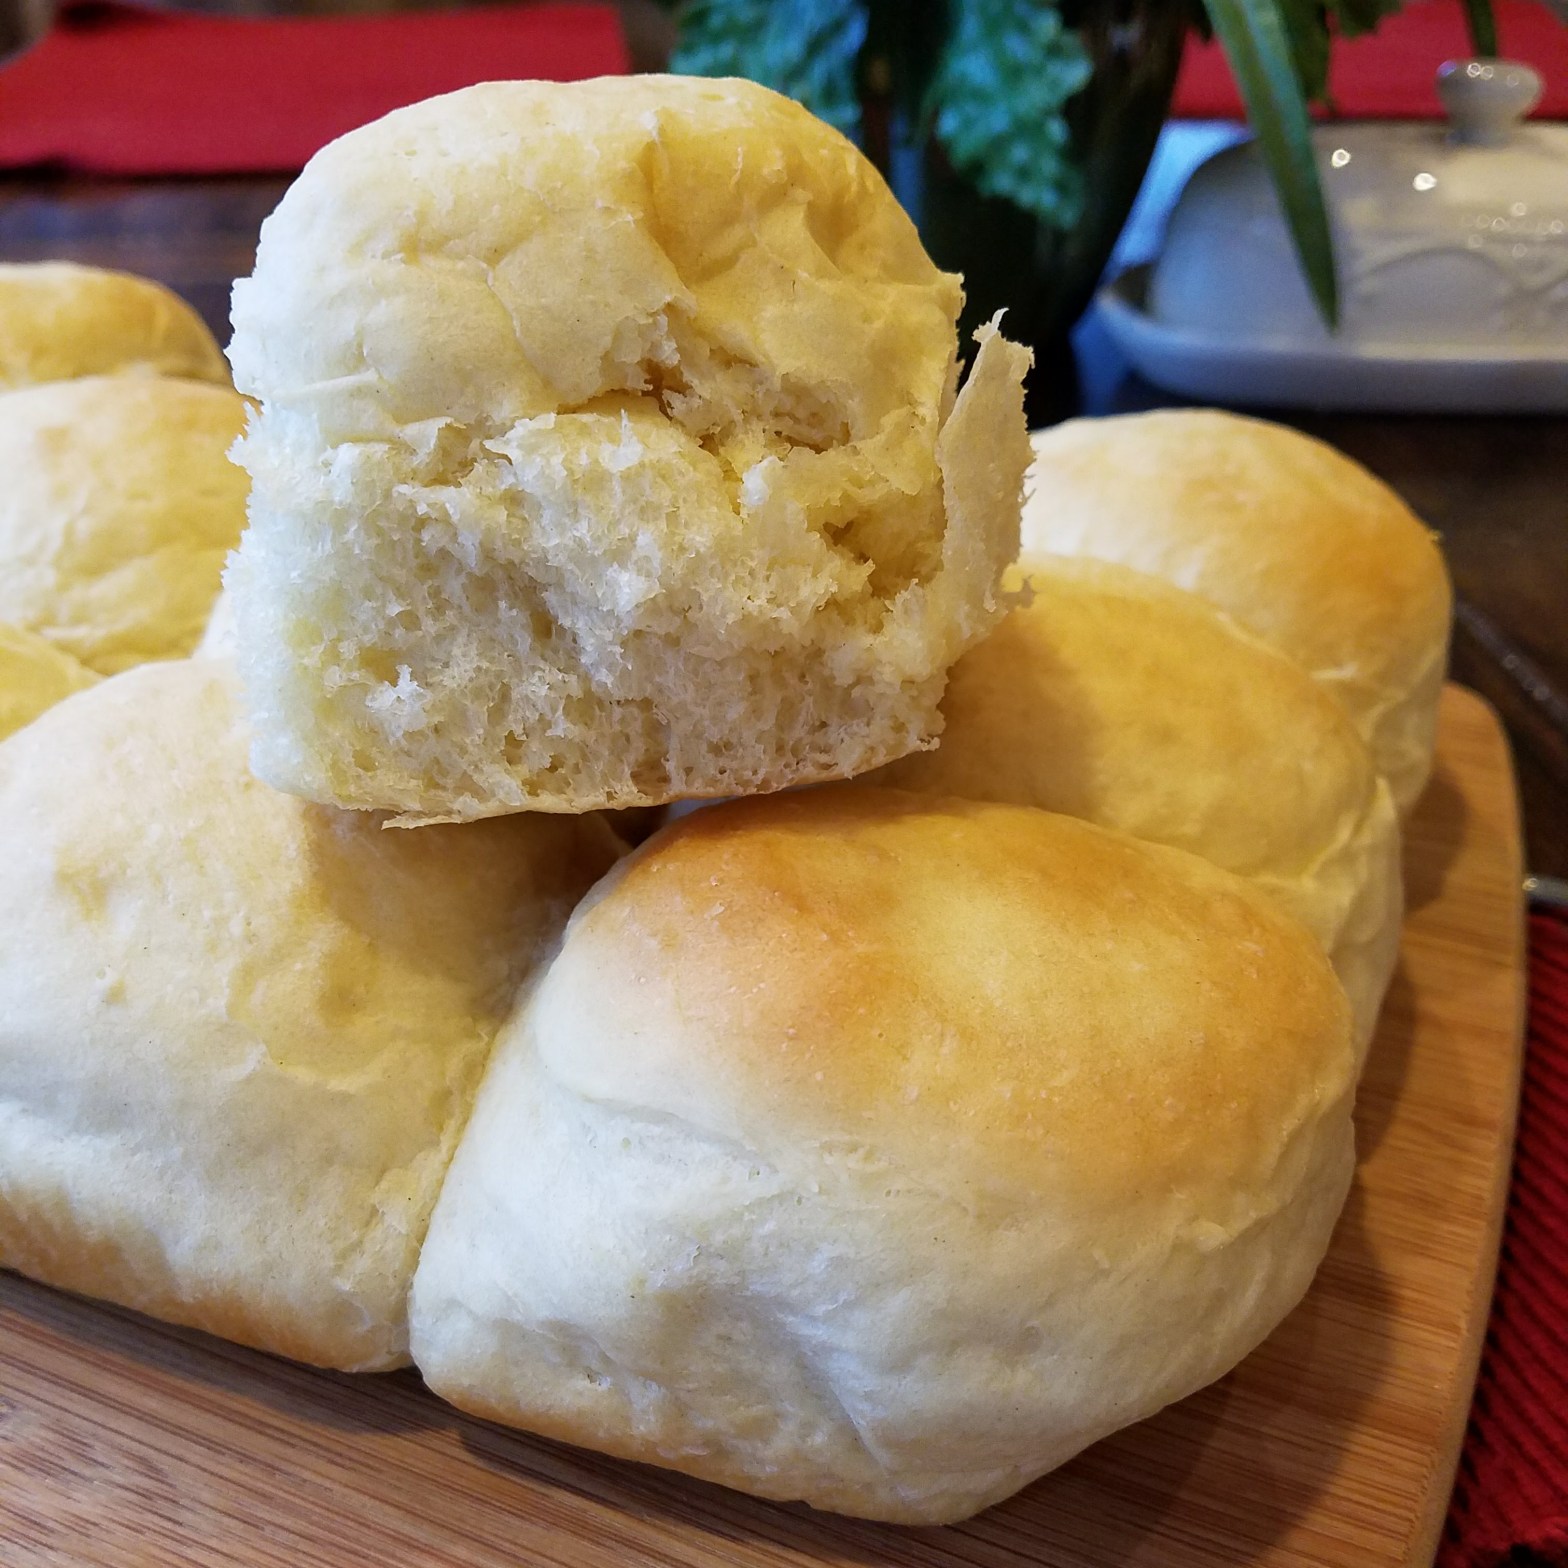
Warm, fluffy, and buttery soft – this is everything you’d want in a dinner roll. Seriously. I’ve made hundreds of these and they are the best. I can tell you now, if you want to be the star of the Thanksgiving dinner this year, bring these. It beats any roll you can buy – Rhodes, Costco, Hawaiian, etc – hands down!
A big thing to know about yeast is – it takes a little bit of time. So just know this isn’t something you can whip up in 30 mins. Most really good recipes for breads and rolls should take at least 2 hours (not including bake time)! Otherwise, you are sacrificing a quick recipe for the tender, light as a feather interior that can really make you a baking champion! And in my opinion, if you are going to go through all the effort and get all those dishes dirty – do it the right way! Even if that means eating rolls as an after dinner snack because you totally messed up on your timing – been there, done that!
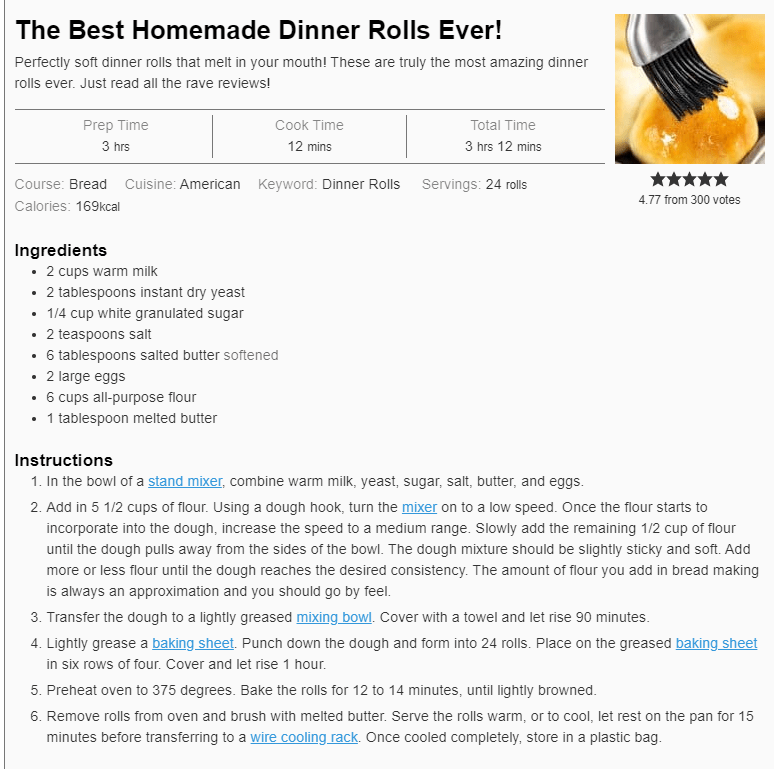
The roll recipe is from the Stay at Home Chef – another all-star blogger! She is really someone you need to follow if you want to become a better baker or cook. The recipe is linked below: https://thestayathomechef.com/the-best-homemade-dinner-rolls-ever/ – Go ahead and click on that and watch her video for more help.
Now, if you’ve never made anything with yeast before, it’s okay because it’s really not that hard! Just make sure your milk is warm – think a little warmer than how you’d like your bath water. If you have an instant read thermometer you’ll want the milk to be between 100-115 degrees.
If you rarely use yeast then I would suggest buying just the yeast packets for now until you start making more. It’s more expensive in the smaller packets then it is in the huge block of yeast but this way you will ensure that your yeast is fresh. If you do end up buying a bigger container – keep any extra in the fridge or freezer.
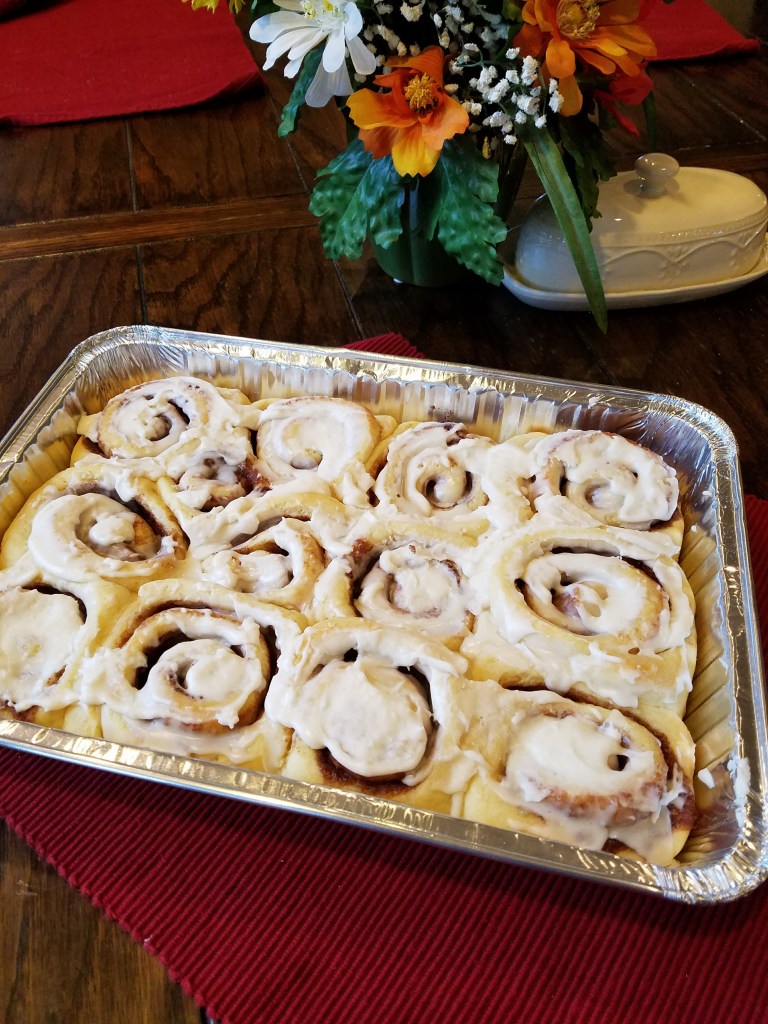
TIP 1: If you don’t want to use a whole baking sheet then you can use two 9x13in pans. Separate a dozen into each. This tip works well too if you want to make half of the dough into cinnamon rolls —tip 4 for more details!
TIP 2: These rolls come out to be a good size roll so don’t be nervous to separate the rolls into smaller amounts in order to make more than 24. This has come in handy when I was making it for a bigger crowd and wanted enough for everyone to have one plus some for extra. I’ve made it into 30 rolls (5 rolls by 6 rolls in the baking sheet) and it is still a good portion.
TIP 3: Try your best to separate the rolls into similar sizes. I love to use a food scale for this to make sure every roll is the same weight. That way I know it will all cook at the same rate and make for a more uniform presentation. If you don’t have a food scale do your best to eye it out!
TIP 4: To make these into cinnamon rolls: on step 3 of the recipe you let it rise for only 60 mins. Then you punch it down and separate into two halves (here you can change it up how you want – one batch of regular dinner rolls and one batch of cinnamon rolls or all cinnamon rolls in which case you can use a baking sheet instead of the 9×13) take one half and roll it into a 12×18 inch rectangle.
Then brush the dough with 1/3 cup melted or softened butter. Melted is easier to spread but softened butter will bake better. Then sprinkle on a mixture of 1 cup brown sugar & 1.5 TB cinnamon
Then roll it up lengthwise and use dental floss or a sharp knife to cut the dough into 12 one-inch slices. Put it into a greased 9x13in pan and cover and rise for 30 mins ***at the 15 minute mark start preheating your oven to 375degrees**** Cook for 15-20 mins depending on how well you like it done. You can also cook the dinner rolls at the same time if you are doing both. Just remove the dinner rolls sooner, as they bake quicker.
Make your favorite frosting to top it all off 🙂 I like to take half of my frosting and put it on the cinnamon rolls a few minutes after they come out of the oven so it melts down in all the cracks. Then after it cools more I put the rest of the frosting on and it settles on the tops. SOOO yummy!!!!
I hope you try your hand at making these delicious rolls! If you have any questions, leave a comment below! Jenny
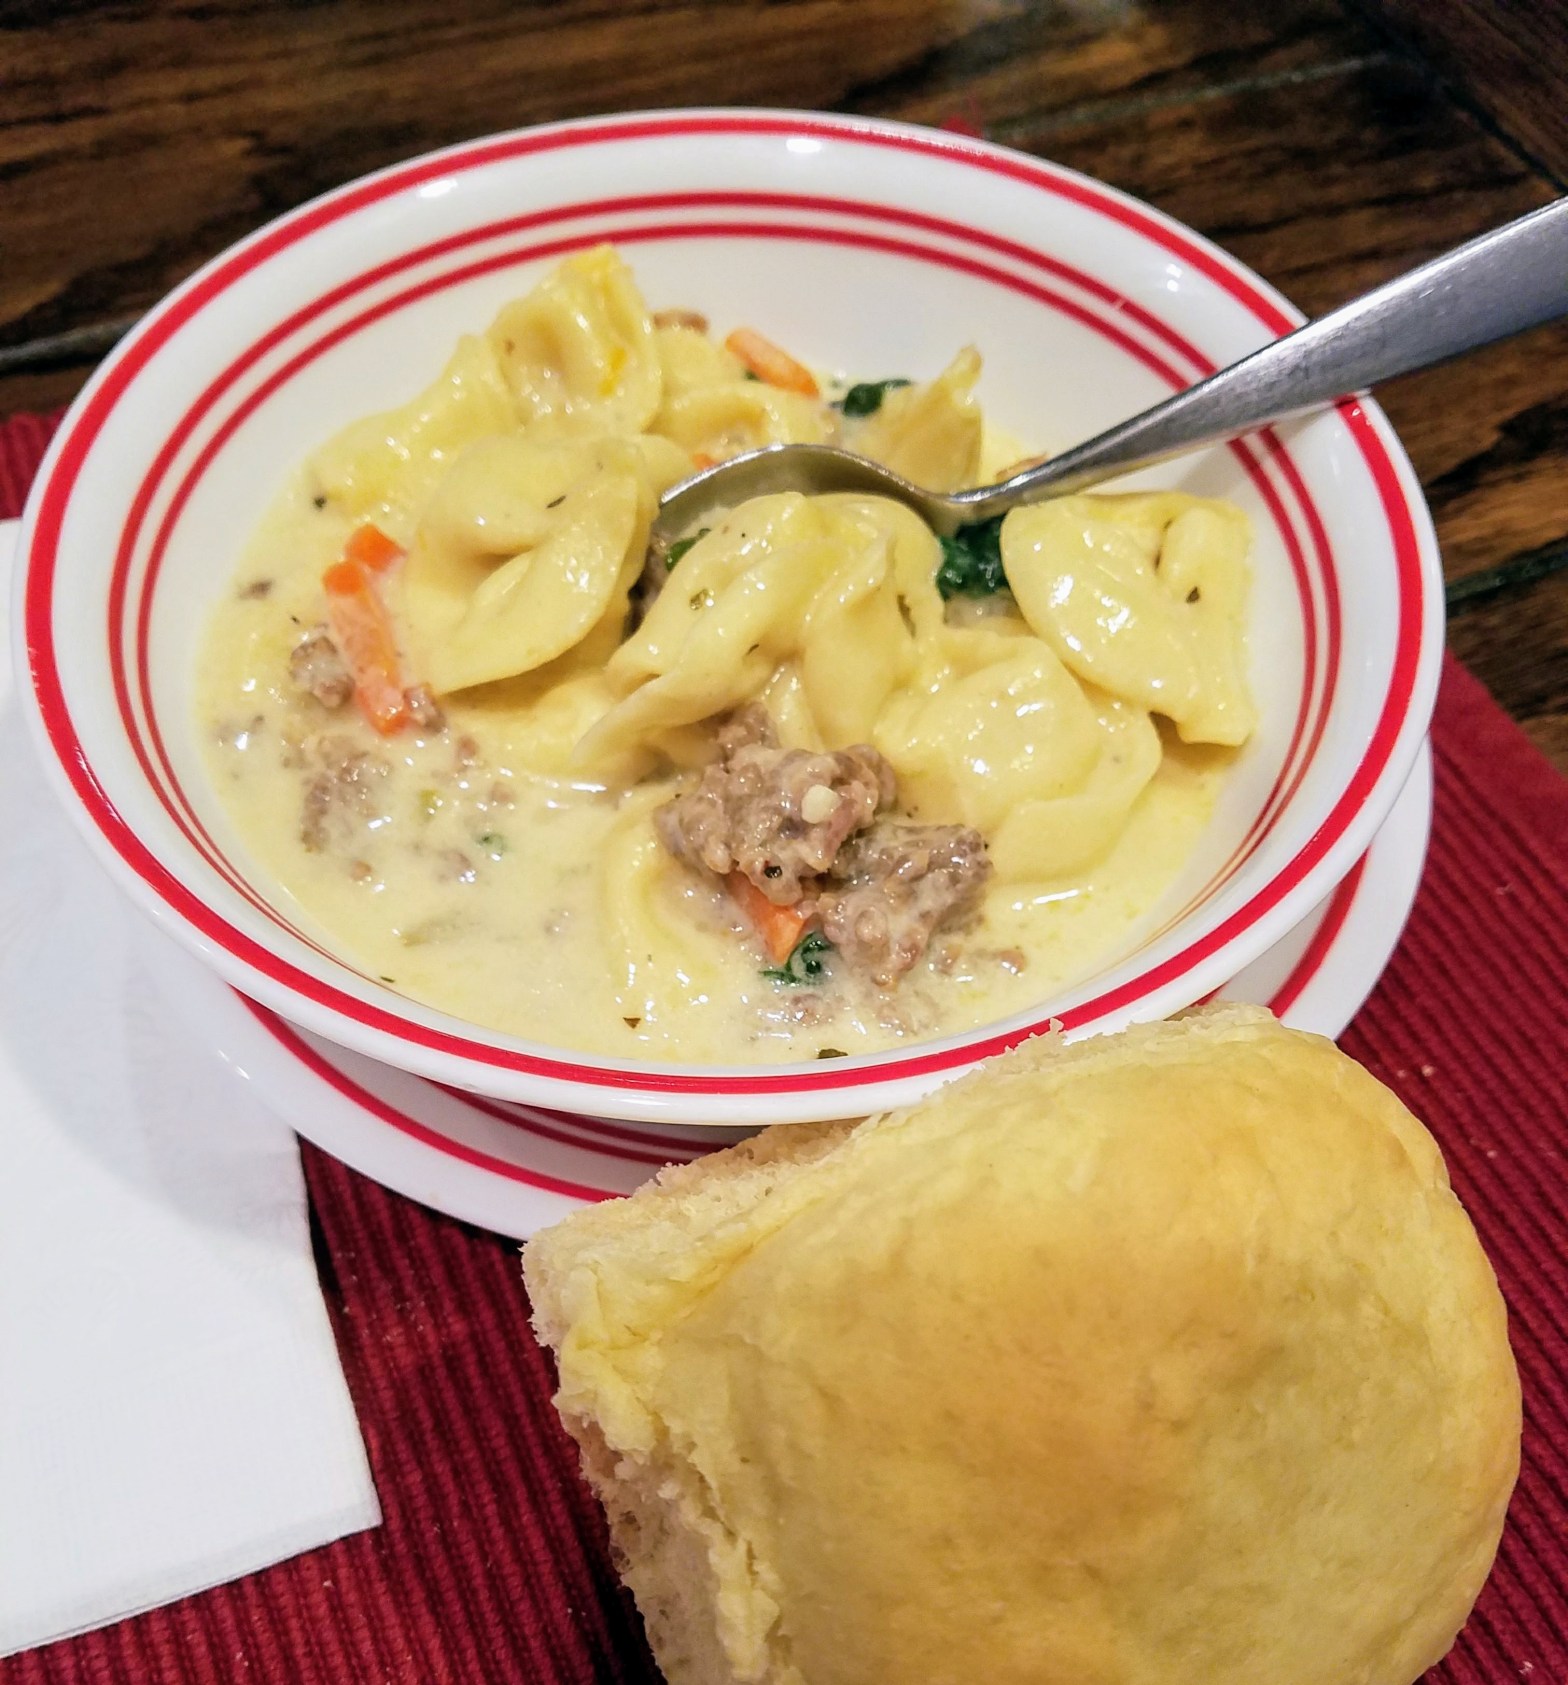
This dish is one that is perfect as is! I have made this soup time and time again for dinner guests and they have all RAVED about it. My kids even beg me to make this. It is creamy, rich, and flavorful. It actually reminds me of Olive Garden’s zupa toscana and chicken gnocchi soups mixed together with a few changes. You will seriously not be sorry you made this, unless you eat the whole pan, which I am ALWAYS tempted to do! It’s probably my all-time favorite soup and maybe even dish ever! But what can I say – me and tortellini are BFFs!
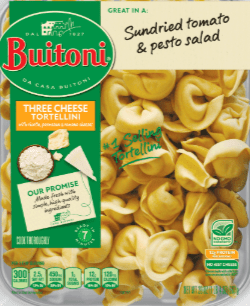
Only tip I have for this recipe (like I said, it’s pretty much perfect as is) is if the fresh tortellini – YES YOU NEED FRESH FOR THIS RECIPE – you get has more ounces than what the recipe calls for then add more chicken broth and more half & half. The kind I get comes in a 20 ounce package which is more than what the recipe calls for. For this reason I increase my chicken broth to 6.5 cups and my half and half to 2.5 cups. I don’t feel like the extra liquids take anything away from the flavor and you get more soup out of it – double win!
Also, a word to the wise – Costco sells their own tortellini and it is a really good deal. But I do NOT like it in this recipe. In fact, I find that the Kirkland tortellini doesn’t pair very well with any type of cream sauce. It really shines in a tomato base recipe – so use it for that – NOT for this dish. Unless you absolutely can’t find another fresh tortellini anywhere else. This is the one I get and I usually can find it at a grocery store like Walmart or Safeway near the produce where they keep the fresh food items.
There you have it! Get this soup on your menu for the week and you can thank me in the comments for changing your life 😉 – Jenny